1999 Honda CRV Transmission Fluid Capacity
When it comes to maintaining your 1999 Honda CRV, one of the essential tasks is checking and changing the transmission fluid. The transmission fluid plays a crucial role in keeping your vehicle’s transmission system running smoothly and efficiently. In this article, we will discuss the transmission fluid capacity for the 1999 Honda CRV, providing you with the information you need to keep your vehicle in top shape.
Transmission Fluid Capacity and Type
| Popular posts |
|---|
| What to do to prolong the life of your manual gearbox |
| Automatic transmission: what it is, how it works |
Before we dive into the details, let’s take a look at the transmission fluid capacity and type for the 1999 Honda CRV:
| Transmission Fluid Capacity | Transmission Fluid Type |
|---|---|
| 2.9 quarts (2.7 liters) | Honda ATF-Z1 or equivalent |
Now that we have the numbers, let’s understand what they mean for your vehicle.
Why is Transmission Fluid Capacity Important?
The transmission fluid capacity indicates the amount of fluid required to properly lubricate and cool the transmission system. It is crucial to maintain the correct fluid level to ensure optimal performance and longevity of your vehicle’s transmission. Adding too little or too much fluid can lead to various transmission problems, including overheating, poor shifting, and even transmission failure.
How to Check and Add Transmission Fluid
Checking and adding transmission fluid to your 1999 Honda CRV is a relatively straightforward process. Here’s a step-by-step guide:
- Park your vehicle on a level surface and engage the parking brake.
- Locate the transmission dipstick, which is usually labeled and located near the engine bay.
- Start the engine and let it idle for a few minutes to warm up the transmission.
- With the engine still running, pull out the dipstick and wipe it clean with a lint-free cloth or paper towel.
- Reinsert the dipstick fully and pull it out again to check the fluid level. The dipstick will have markings indicating the minimum and maximum fluid levels.
- If the fluid level is below the minimum mark, you need to add transmission fluid. Use a funnel to pour the fluid into the transmission through the dipstick tube. Be careful not to overfill.
- Recheck the fluid level using the dipstick and add more fluid if necessary.
- Once the fluid level is within the recommended range, securely reinsert the dipstick.
- Turn off the engine and give it a few minutes to settle.
- Lastly, take your vehicle for a short drive to ensure the transmission is functioning properly.
Conclusion
Now that you know the transmission fluid capacity for your 1999 Honda CRV, you can confidently maintain your vehicle’s transmission system. Remember to use the recommended transmission fluid type and always check the fluid level regularly. By taking care of your transmission, you can enjoy a smoother and more reliable driving experience for years to come.
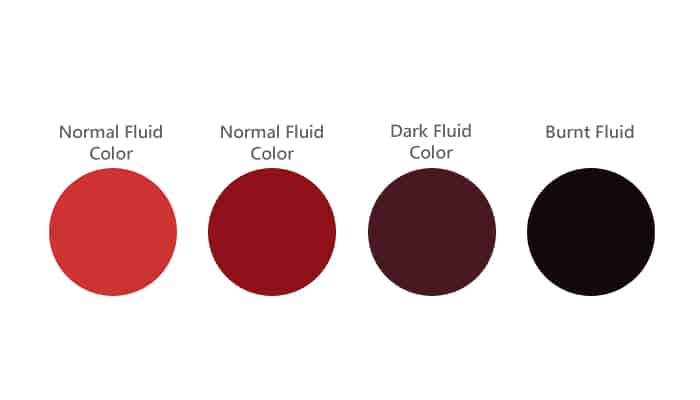
What Color Should Transmission Fluid Be?


